Sunday, December 30, 2012

Simple Joys

We are back from our 5 day pre-Christmas vacay in Camiguin. Things have been a little hectic and our body clocks still have not yet gone back to its old rhythm.
We have been mostly "on the go" during our vacation, travelling for most of the day on our last day -- from Camiguin to Cagayan by boat, back and forth from Cagayan to Bukidnon by land and then to Manila. In Manila, after a quick stop-over to my parents' place we went to my in-laws' for an early Christmas dinner. Needless to say, we were dead tired for noche buena!
Had it not been for the Christmas day family reunion that we were hosting we would have slept the whole day!

Don't get me wrong. It's been a lot of fun. Both our vacation and the family reunion. It may have been crazy hectic but nonetheless still a lot of fun. However, although it has been a couple of days after our body clocks still have not adjusted. Its like having jet lag. Apparently, it can occur without travelling through time zones.

And although I always look forward to the feverish frenzy that usually afflicts everyone (at least those whom I know) during this time of the year it is during the week between Christmas and the new year that I often find myself longing for a little quiet time.

I have been promising myself to make time to enjoy a couple of good reads. It hasn't been easy. Work (and whole lot more!) tends to get in the way and instead of reading for leisure it becomes work-related. Most of the time it annoys me that the side table in our room holds my textbooks and notes! That reminds me. I have a couple of modifications to make on my handouts and power point lectures...ugh! Well, I guess, those will have to wait. At least for a while.

 
Obviously, I won't be able to finish this book within a few minutes (that's all the time that I have) but at least that's all I need to enjoy it with a good cup of tea.

Saturday, December 29, 2012

Repurpose a Box into a Bookshelf

I used a lot of these cardboard storage boxes to hold my old notes, journals, reports during grad school.
I am was pretty OC about keeping my school stuff in order and organized (alright, I admit, i was a bit of a nerd).
 
 
Anyway,I recently purchased a couple of storage boxes for a little project I did for our living room. I only used the box covers and I didn't know what to use the actual boxes for. A light bulb moment came and hit me as I was starring at some of Alonzo's books.
 
Just a little side note: early this year we planned to "convert" SIL's room into a playroom and mini library for Alonzo. SIL  has migrated to Australia five years ago, by the way.
We have succeeded in our plan about the playroom but most of Alonzo's books still have been kept in our room. 
I wanted to keep all of his toys and a few of his books out of the room where we co-sleep. His favorite bedtime books, however, will remain in our bedside table.
 
And although SIL's room/ Alonzo's playroom/ mini library has an entire wall space of shelves it still holds most of SIL's books and other stuff (it is still her room, after all!). The open shelves on the lower half can only display some of Alonzo's toys (the rest are stored in baskets we bought at Dapitan about a year ago). Most of his books lie on the middle shelving area (still a little too high for his height), making it hard for him to see and take them out whenever he wants.    
 
And this is where my DIY bookshelf comes in.
Simply put one box over the other and you could already call it a "book shelf". What could be easier?
 
 
Obviously, it can't be used to hold a volume of encyclopedia!
You may place a piece of plywood between the two boxes for support and secure them together with pretty duct tape (yes, they are out there! I found plain colored ones at National Bookstore but the printed ones are available online). I plan to do this soon and will be posting how they turn out.
 

Wednesday, December 19, 2012

Hand Sewn Bear Applique Pillow Case

Our toddler has been using his dad's old pillow case. This pillow case had not been used for quite some time and was pleasantly rediscovered about 7 months ago under a pile of beddings. It is actually an eleven-year old Ralph Lauren polo bear pillow case which I gave hubby (then boyfriend) as a pasalubong. I showed it to Alonzo and he instantly asked me to let him use it. The thing is our little guy has become so attached to it that he tends to get melt downs whenever it has to get washed! 
 
 And because I couldn't think of what to get our little guy for Christmas (too many toys and clothes already!) I thought of making him a bear pillow case so that he could use it alternately with the one that he's using.
 
I scoured fabric stores in Glorrietta and Greenbelt for any cotton fabric with a bear print (I wouldn't dream of going to Divi this time of the year). To my dismay I couldn't find any that I liked. I almost considered getting the Christmas-sy bear printed fabric at Fanbi's until I remembered that we have several un-used, white pillow cases at home. I decided to just use that and create a bear applique over it. 
 
would you believe I almost got this for P350 per yard??!!!
While I was still pregnant we took a trip to Ilocos and bought several Abel beddings and pillow cases for Alonzo. The blankets are used often but the pillow cases have never been used because both ends of the pillow case are left open, causing our pillows to flatten out.
 
I also have a lot of felt fabric left over from my previous projects so this really didn't cost me a thing. Working with felt fabric surely saved me a lot of time. It doesn't fray and therefore it doesn't require hemming. If you are working on a tight schedule and running out of time you'll surely consider it a Godsend. 
 
 
 This project was finished just in time (only just a few minutes ago, actually!). I have been working on an impossible schedule at work lately and the family is set to be away for a pre-Christmas vacation at the beach (yipee!!!) in a few hours. So I really had to get it all done before leaving.
 
 
       Hope the little guy likes his new pillow case just as much as his old one. 


Cheap Gift Wrapping Ideas

In case you haven't finished wrapping all your Christmas presents this year here are a few quick and inexpensive ideas.
 
You probably know by now how I love using pattern paper (as seen here and here, too!). Come on, they sell for P19.00 for a pack of 5 sheeets! How can I not love that??? What I also love is the countless ways you could decorate with it.
 
 
If you are into the neon trend attach brightly colored label stickers (available at office supply stores) all over and tie with neon colored yarn.
 
 
Another material that I love to wrap with is papel de hapon.
Although I often like to add accents or additional frills such as mini paper parasols, twigs and even balloons, with its bold and bright colors a simple jute string bow could be enough to make your present stand out. 
 
 
Now, what could be easier than using a brown paper bag?
I remember how I painted several dozens of these years ago when my sister asked me to decorate them for a project their school organization was putting together. If I had the time I probably would consider doing that again but as of the moment a simple string made of straw and a Post-it note does the job perfectly. 
 
 
How can I not include newspapers, old magazines and phone directory sheets? They're free and it also wouldn't hurt to be a little green this season.
  

Tuesday, December 18, 2012

Gift Giving Project

One of our ninangs sponsored a Christmas gift-giving and feeding program for 200 indigent children and hubby and I were delegated to do all the shopping and packing.
We knew it wouldn't be easy. Although we've had years of experience doing something like this when my in-laws had a similar project the number of kids, this time, were doubled.
We took advantage of the Bonifacio Day holiday and started shopping for toys at Uniwide. Hubby and I impressed ourselves by having to spend only 50% of the budget! Wohoo!
 
 
The next two Sundays were spent for grocery shopping. Now, shopping is one thing but packing everything into individual bags is entirely a different matter!
 
The living room, dining room and kitchen were used as "stations" for the goodies (canned goods on top of the coffee table, milk and juice products beside the altar, etc.. ).
 
 
We would repeatedly go through all the stations carrying at least 5 plastic bags and pick an item for each bag.
 
 
Things would have been easier had there been not just hubby and me doing all the packing and a conveyor belt would have been great, too!  
 

Another issue to deal with (aside from our aching backs) was how to arrange and store everything. The completed bags had to be kept separate from the rest and they occupied part of the hallway up to our rooms.
 
 
The bags also had to be organized per gender. We intended to color-code the bags but only white ones were available in extra large so in addition, to distinguish the bags containing toys for girls, boys and also gender neutral ones, we had to tie differently colored ribbons around them.
 
 
By 8 PM we were only a little more than halfway done. Hubby and I were hungry and exhausted. So we just ordered pizza and also called for reinforcement.
 
We finally finished around 10PM but had to clean up and move the bags to make the house more "passable" and also to make them easier to load and transfer in the truck.
 
We weren't there when the toys and bags were distributed to all the kids but the photos showed how happy they were.
 Their smiles made it all worth it.
 

Monday, December 10, 2012

DIY Mini Parol Ornament

 Is it just me or does time really go faster around this time of the year? I knew I had a lot of time to get ready for the holidays (Christmas decorating, shopping, gift wrapping, baking, etc..)and had actually set a time frame for all of these activities.
 
But what wasn't part of my schedule was having to shop and pack gifts and groceries for 200 children. I'll blog about that some other day.
 
In the mean time, let me share a little Christmas project. Last year I made miniature candy cane ornaments out of drinking straws and because we have a lot of straws around I used them again!
 
All you'll need are:
Drinking straws
Washi tape or any colored tape
Scissors
 

Step 1: Cut 5 straws in similar length
Step 2: Attach 2 ends of straw at an angle with tape


Step 3: Continue doing step 2 on all ends until a "star" is formed
 
 
Note: Make sure to overlap the straws alternately to make your star more stable.
 
 
Step 4: Attach a piece of ribbon or string and hang


Thursday, November 29, 2012

Refashion a Belt into a Bangle

I had a minor wardrobe malfunction a couple of days ago.
Thank God, it wasn't something disastrously embarassing that I couldn't share here. The belt that I was wearing got torn into 2 pieces. Although the belt only cost me a only a few hundred pesos (probably why it tore in the first place)I loved how it gave a simple, boring outfit a hint of attitude and character. So what's a frugal gal such as moi to do? 
Refashion the damaged belt into a bangle!      
 
 
For this you'll need a leather punch,
scissors and
heavy duty glue.
 
 
Step 1: Cut belt into desired length or at least a length long enough to wrap around your wrist (I wanted it to go around twice)
Step 2: Eyeball the area where you want the belt hole and mark it with a pencil
Step 3: Punch the hole
Step 4: Cut a small piece of belt material (just enough to go around the strap plus a little more to glue the ends together) to make an "anchor" or the part where the belt strap rests against)
Step 5: Glue the ends together, let it dry and insert through the strap
 
All done!
 

Wednesday, November 21, 2012

Simple Joys

I know I don't usually blog about stuff other than my crafts and projects but while browsing through folders and folders of photos to choose for this year's appreciation wreath I couldn't help get nostalgic and even teary-eyed as I somehow re-lived the year through our photos.
 
This may sound so cliche but I'll still say it, time flies unbelievably fast. How can the year be almost over when the Christmas-themed throw pillows borrowed from Mama last year, I thoughtlessly only now realize, remain unreturned and are actually still on display. But what can I say, it has been a wonderful year. We had a couple of bumps but we definitely still consider ourselves incredibly blessed that deciding on which photos to include for this year's appreciation wreath is a challenge. There are so many things to be gratefull for.
I, therefore, thought of sharing now and then some of what I consider the little joys of my life.
 
And I'll start with this...
 
 
Watching my boys as they sleep


Tuesday, November 20, 2012

DIY Personalized Mugs

 Here's a project that's been all over pinterest lately. Draw over your mugs, bowls, cups or whatever with a Sharpie marker and bake in the oven at 350 degrees Fahrenheit for 30 minutes. Baking makes the ink permanent. I don't know if a different marker may be used because I haven't tried any other brand.


Obviously, you could draw any image you want. I chose to write the first letter of our names using some sort of freehand 3D font. These, by the way, are the mugs that I recently bought for P12.00 each at our latest trip to Uniwide. We found cheaper mugs selling for P10.00 but I really love how the insides are colored yellow (I have been into yellow since 2006!).
 
 
 I feel kind of iffy about the marker coming into contact with food or beverage so I wouldn't use it for the insides of mug. I cannot deny though how i love this easy project is so much. Had there been any more plain mugs left I would have used them all!  
Have fun! 
 

Monday, November 19, 2012

DIY "Tingga" Choker

My husband loves to stroll along the aisles of Mr. Handyman or Ace Hardware and could spend some time just going through corridors and corridors of stuff. It used to bore and annoy the hell out of me at first, especially during the early years when we were still dating during collge. Things have changed over the years. I now can spend quite an amount of time "window shopping" and searching for potential materials that I could use for my projects and crafts. Most of the time I couldn't identify what a certain hardware item is for nor what it is called so it is always best to bring hubby (who is always willing to come)along.   
 
The hardware nutty bracelet made out of hex bolts has been a favorite acccessory that I wear often has received lots of compliments from friends (those guys already know what they're getting for Christmas).
 
 
 Here's a recent project that I made for Yahoo! She made out of washers or "tingga". On a trip to Mr. Handyman I was pleasantly surprised to know that they are available in larger sizes. I was there only to get the usual sized ones, the kind that we used to play sipa as kids. Believe me, I was like an excited kid in a toy store. 


Saturday, November 17, 2012

Frugal Finds at Uniwide Part 2

It's been a while since we've been to Uniwide. Although hubby and I were happy with our last visit we were never able to go back until last weekend.
 
What can I say? Uniwide is a very dangerous place. Not in a negative way, though. It's just that hubby and I ended up with (multiple) random, unplanned purchases. The original intention was to make a quick trip to purchase about 70 pieces of covered  plastic drinking glasses -- an errand Mama asked us to do for the feeding program organized in church. SM was on our first agenda but surprisingly, they didn't have what we were looking for. Uniwide has them but there weren't enough and we couldn't leave empty handed...         


These rubber alphabet cut-outs used to be sold by the kilo. I already wanted to get Alonzo a pack the last time but hesitated because I thought that I had to get a whole kilo of these. If I remember correctly, they were sold at P250/ kilo. I mean, what would I do with a kilo of alphabet letters??? What I didn't know was you could purchase just one pack and have it weighed and pay accordingly. Silly me. Anyway, they are now sold by the pack at P29.00. I made a mental count of the number of kids that I could them to and almost ended up getting everything in the crate!

 
Now, aren't these ceramic owls adorable?
 

I was already picking which of these little guys would go home with me until this charming piece caught my eye. Wouldn't you agree that it looks so Anthrologoly-esque??? I super love it and for only P59.00 I couldn't resist.


I also couldn't get these porcelain balls sold at P39.00 for 2 pieces off my mind either as I toured around.

 
These are just a few of our purchases that day. I got ourselves several pieces of coffee mugs (for a project that I have in mind), a bundle of barbecue sticks, a wooden board puzzle for Alonzo and a Santa hat. And would you believe that hubby was able to finish off his Christmas list all in one go on our visit to Uniwide?!!
 
I'm now regretting not getting the pastel-colored, polka dot serving plates and coral shaped candle holders.
We'll have to go back there soon!
 

Tuesday, November 13, 2012

Pallete Drawer/ Crate

Last year I purchased several slots of pallete sold along the main road of our village and commisioned a local carpenter to make wooden crates out of them (my carpentry skills -- sawing, in particular, isn't something I could brag about). We use the crates in the kitchen to hold plates and bowls. 

Mama loved the idea and asked the same carpenter to make more for her home. But instead of leaving the crates unpainted, like ours, she painted them in different colors and attached ceramic knobs which she bought at her favorite thrift store in San Francisco.

 
Mama keeps the colored crates (they actually look like drawers) under the sofa to store some of Alonzo's toys. The little guy spends most of his time in my parent's house in the living room where he plays and this is a great and attractive way to hold his toys while keeping the clutter  down (a bit, at least).


Can I just say that I love and adore these knobs! Mama bought them for 10 pieces for a $1.00!!! That's 10 for only P41.00. I immediately asked her to get more for me but when Mama went back to the store they were all gone :(
Oh, well.

Monday, November 12, 2012

Christmas Mode

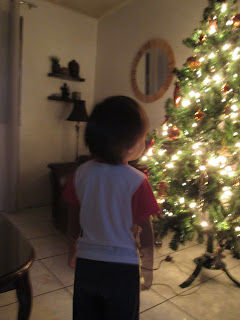
Hubby set up the Christmas tree and lights a few days ago.
We used to decorate for the holidays right after Halloween when we get right into Christmas mode and are all gung-ho and energized for all the holiday decorating. Things were a little different last year when we didn't seem to be in the mood for setting up the tree. We even came to a point of justifying not having a tree for fear of our toddler toppling over it! Lame, I know! Perhaps all the energy we had was spent on our house painting project? Anyway, hubby seemed to have a surge of energy last week and decided to take advantage of it by setting up the tree as well as the Christmas lights in the garage. He figured procrastination would get us no where and he didn't want the little guy to miss out this year. Hubby started working on it just as soon as Alonzo slept and finished everything to surprise the little guy with the lighted tree in the morning (our son is an early riser and wakes around 5:30 a.m.).
 
 
So here is the little guy, marvelling at our tree (a hand-me-down from sister-in-law!). We now spend a few minutes in the early morning just staring at it. Sometimes he asks his Dad to turn on some music -- no, he does not ask for Christmas songs but specifically requests for Chris Daughtry's song, "Home" (don't ask me why but this song is his current fave).     
 
Unfortunately, I still have a long list of things to do to get ready for Christmas! I haven't even started shopping yet -- as in not at all. Oh well, so much for the idea of giving out all hand-made gifts this year...

Saturday, November 10, 2012

Alonzo's Halloween Costume 2012

I'm back!
Whew, after my uber hectic schedule just prior to the long weekend holiday i'm back to blogging! Yey!
 
We dressed the little guy as a monk this year. This was the original costume idea that I had for his 1st Halloween but I thought his Starbucks barista costume was too cute of an idea
for an eight month old.
So this monk costume was put on hold for a while.


 Anyway, the brown cotton fabric is from Cotton Exchange
and costs only P60 per yard!!! One yard was enough to make this so that's just how much this costume cost me. Yup, it doesn't take that much -- even with the hood. The canvass cord used as a belt was just left over material that I used from the hex nut bracelet that I made a couple of months ago. The a small canvass pouch around the belt was a bag used to package coffee beans. So that didn't cost me anything either.
 
Let me also share with you some of the cute Halloween decor at the Sta. Elena Halloween party:


oblivious of the party activity
-- he was just too happy about all the candy!

Cute loot bags!
Vertical slots were sewn on at the front
where crayons where inserted.
The crayon tips seemed like the monster's teeth


So now that Halloween is over I'll have to switch to Christmas mode and get ready for some fun and festive holiday crafting!