Monday, October 31, 2011

halloween decorating

i didn't grow up in a house that decorated for halloween. 
i guess it follows that i also won't decorate our house for this holiday. for me, it seemed a little superfluous, not to mention cumbersome to go all out with the decors when most of the neighbors have already started decorating their homes for christmas
(our neighborhood isn't too big on halloween). 
you may notice that i'm speaking in past tense here.  
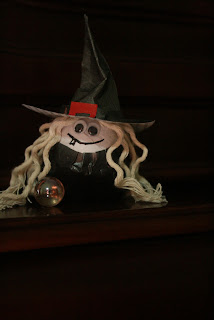
well, this year i gave in and decided to embellish our home
a bit for halloween.  


what can i say? halloween crafting and decorating is so much fun!


i know this isn't much.
as i mentioned from a recent post, i had been extremely busy and ran out of time!
i hoped that could have done a little bit more.


but there's always next year...

Sunday, October 30, 2011

toilet paper craft: vintage airplane

i know it's been a while since my last post. i had a really busy week. my halloween projects have piled up on me and
it's almost the 31st! i guess i'll just have to save my unstarted and unfinished projects for next year. 
i also realize that this craft project isn't exactly in tune with the halloween season but it'll have to do (see last photo).   


the idea for this project hit me in the wee hours of the morning. 
(just as soon as my little toddler woke me up, searching for his favorite thing in the world --- his "binky"). 
before going to bed i had been staring at a drawer full of toilet paper rolls and kept thinking of creative ways to re-use them.
we all have our light bulb moments. for most of us these light bulb moments come to offer guidance and providence, provide deep insight on life and its meaning. for me, my so-called "aha moments" inspire me about the profoundness of what to do with toilet paper rolls.

allow me to share my light bulb moment idea with you.... 

step 1: cut out the parts of your plane (i used corrugated card board) 


step 2: cut out a circular hole from toilet paper roll
(make it slightly off center)
step 3: cut out "slots" for the wings and tail


step 4: insert 2 circle cut outs on each end of the tube 
step 5: attach the rest of the plane parts and glue in place


step 6: paint and attach stickers onto plane (optional)


this little witch prefers to fly by plane over the traditional broomstick!
 

Sunday, October 23, 2011

re-using empty baby food bottles: luminaries

this halloween project can be done in a few minutes.
because it is relatively easy and also very tolerant for mistakes, this would be perfect for instant or last minute halloween party plans!       


step 1: cupapel de hapon into approximately 2-inch strips


step 2: coat bottle with a thin layer of watered down glue
step 3: apply papel de hapon over bottle, allow strips to slightly overlap -- just as you would with paper mache)


step 4: continue until entire bottle is coated
(its okay if you don't smoothen out the creases. as i said, this project can tolerate major imperfections!) 


step 5: let it dry
(note that a single layer this gives a more transluscet effect)
 
take note of this little baby higad trying to sabotage my project!

step 6: cut and paste a prefered image onto bottle
(optional) 
this is just a symbol printed out from the computer!

step 7: pour a bit of sand inside and top with tea candle  

voila!

Monday, October 17, 2011

Spinach Balls

Here's another spinach recipe that had become an instant fave during reunions. This could be a vegetarian alternative to meatballs and combined with pomodoro sauce or it could be served as it is. Either way, these are guaranteed to disappear in an instant!


Ingredients:
2 cups fresh spinach, blanched, drained and chopped
1/2 cup parmesan cheese
1/2 cup bread crumbs
3 eggs
1/3 cup melted butter
salt and pepper

Procedure:
mix all ingrediants together and form into 1 inch balls. place into oven toaster and bake for 3-5 minutes.

Sunday, October 16, 2011

witch egg


  step 1: construct basic paper mache egg
step 2: attach googly eyes and draw face
step 3: wrap black paper around "body" of egg
(i created little pleats on the top)
step 4: glue unravelled twine to top part of egg to make "hair"
step 5: attach hat*

*witch's hat
step 1: cut paper into shapes shown below 


step 2: shape rectangular paper into a cone, glue and trim excess paper


step 3: cut a cross onto center of circlar paper
step 4: fold to make "tabs"
step 5: glue "tabs" onto cone


step 6: glue red "buckle" and squish cone of hat to achieve a more "realistic" effect


witch with "crystal ball"