Showing posts with label toilet paper rolls. Show all posts

Tuesday, April 22, 2014

DIY Doll Table and Chair Set


Here's another amazing way to recycle toilet paper rolls into toys.   Turn those tubes into an easy-to-assemble set of miniature chairs and table that your kids (and dolls) would love. 
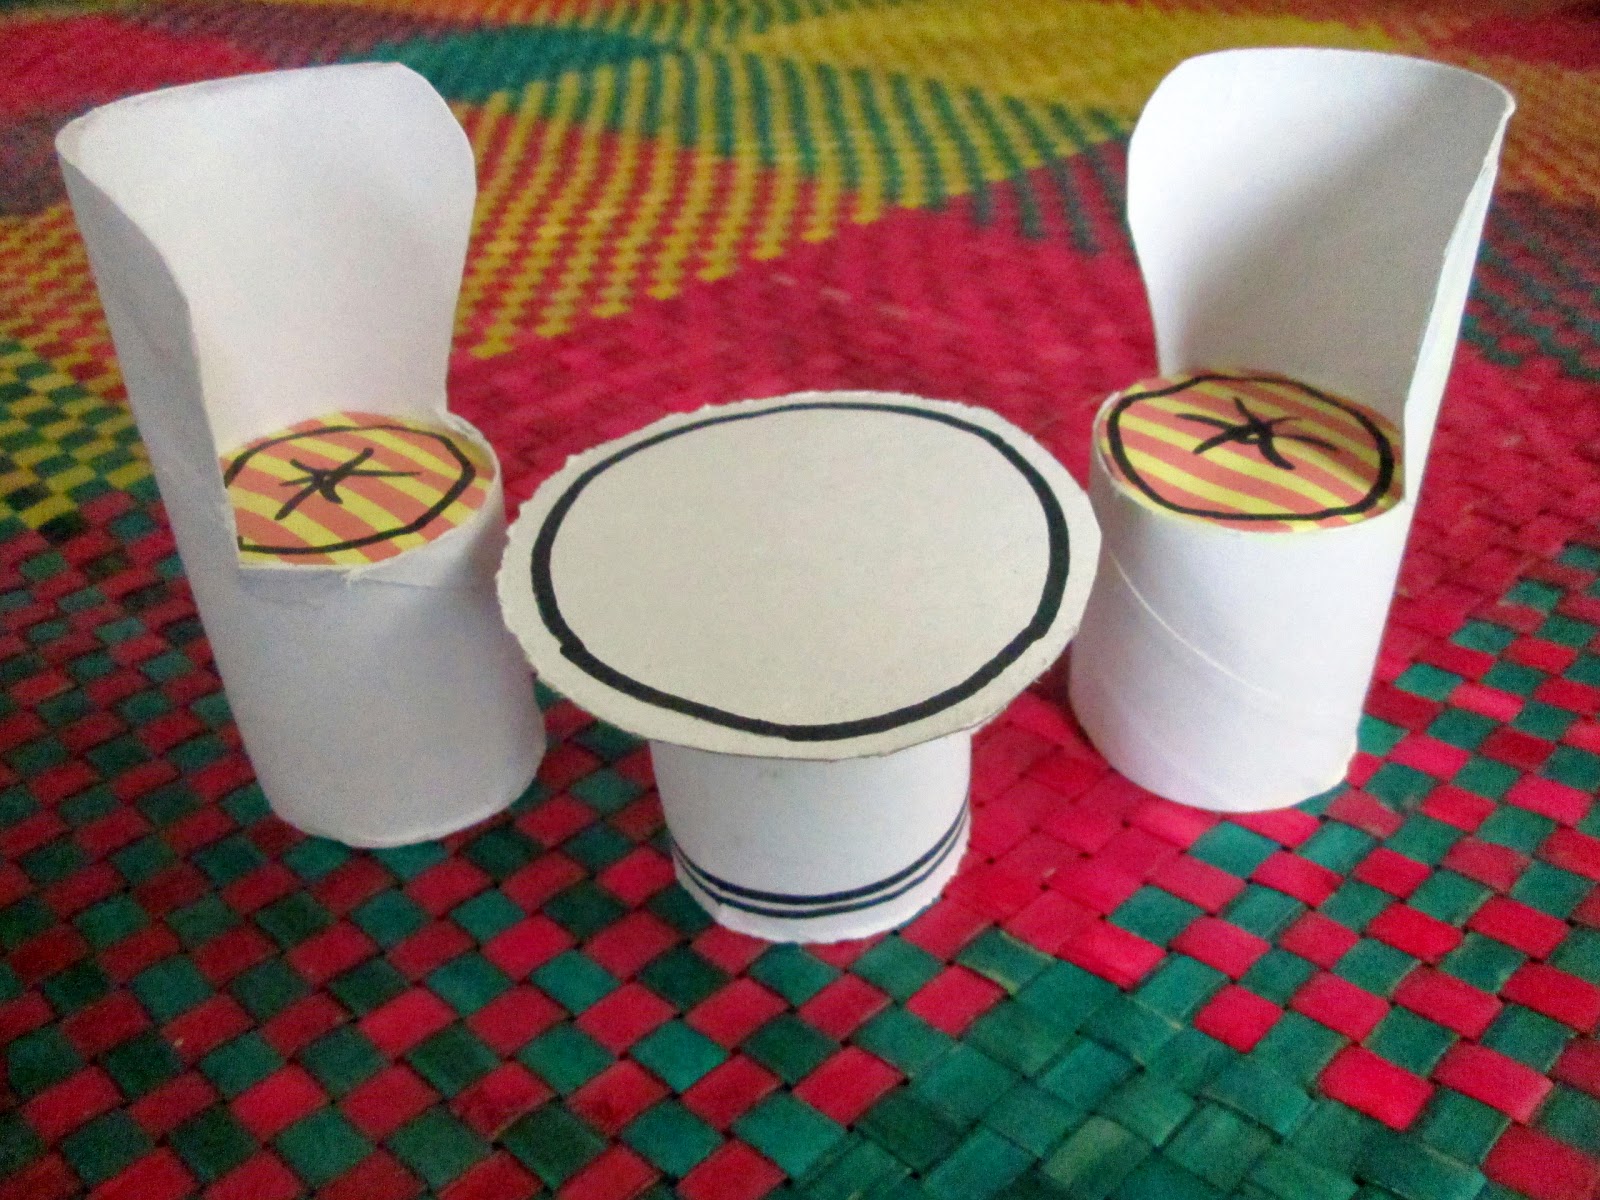

Material s needed:
Toilet paper tubes
Scissors
Cardboard
Old gift wrapper or any paper with a pretty print
Glue

Step 1: Cut tissue paper roll to make a “back rest” 


Step 2: Trace the end of the tube on a piece of cardboard to make a circle

Step 3: Cut to make a “seat”
Step 4: Use a small piece of gift wrapper to cover the “seat”
Step 5: Attach “seat” with tape
Step 6: Cut cardboard to form the top of the table
Step 7: Attach to toilet paper tube with tape 


I hope that this would inspire some DIY projects of your own!

Monday, February 17, 2014

Guest Crafter: DIY Toy Telephone

Happy Monday, you guys! Let me start the week off with my first ever guest crafter post. 

Now, isn't this DIY telephone simply adorable? I L-O-V-E how the materials made use of recycled stuff (toilet paper roll, hello???)...and how charming is it that the numbers are written backwards (hee-hee)? Love it!      


Before further ado, my feature crafter is no other than Dr. Katet Capulong. We first met in December 2000, during an entrance examination at the University of the Philippines. We were both applying for a residency slot at the Orthodontics Graduate School Program and we have been close friends since then! What else can I say? We were thesis mates, poster presentation partners, compre-exam study buddies, partners-in-crime (whenever we felt rebellious against Dr. H) and oh, she was a bridesmaid, too, at my wedding!

Here's a step by step guide from our feature crafter herself:  

1. I started doing the body of the telephone by using the inner side of a milk box (1.6 kg box). Shape and cut it to form a trapezoid.
2. Using a colorful box, I cut a big circle to serve as the phone's dial. I cut a smaller circle to put over the big one.
3. Cut 10 small circles around the dial using a puncher. Place the numbers 1-0
4. I used the cardboard of 2 tissue paper rolls to make the receiver. Tape them together to make them longer. You may use the cardboard from a  paper towel roll too.
5. Cut 2 plastic cups and put them on the two ends of the tissue rolls.
6. I used a tiny paper bag around 2-2.5 inches long and cut it to hold the receiver. Glue them on top of the body of the telephone.
7. Attach a ribbon on the end of the receiver. Twist the ribbon to make them curl and attach the other end of the ribbon to the base of the telephone.

Happy crafting!

Monday, February 10, 2014

Toilet Paper Tube Projects

I will never seem to get tired of creating toilet paper tube projects (after all, it's something that we always have around!). Visit Yahoo! She for an article I made about some of my projects.

Tuesday, December 10, 2013

Monday, October 14, 2013

Toilet Paper Roll Owls

 You may already know by now how much I love to "work" with toilet paper rolls. Over the weekend I created these flock of owls (did you know that they called a parliament?) out of toilet paper rolls in an attempt to get started with Halloween.
 
 
To make you'll need a couple of toilet paper rolls, marker pens and crayons or colored pencils.
 
Get started by following steps 1-3 of one of my favorite "trash to toys" projects. The next step is pretty much self-explanatory. Draw an owl and color.     


I don't think I succeeded in making these owls appear anything near scary-looking but I think these little guys turned out looking pretty handsome.


Thursday, June 20, 2013

DIY Pretend Fast Food Part 2

Wasn't yesterday's tutorial so much fun? Here's part 2 on how to create pretend fast food for the little kiddos (hubby enjoyed this craft project too but complained that it made him hungry)


To make pretend fries you'll need the following materials:
Several pieces plastic straws
Toilet paper roll
Crayons or markers
Scissors 
Step 1: Flatten toilet paper roll
 
 
Step 2: Fold one side of toilet paper roll inwards
 
Step 3: Do the same on the other side
 
 
Step 4: Cut off about 1 ½ inches from the other end of the toilet paper roll.
Step 5: Make a semi circular cut on one side.
 
Step 6: Use crayons or marker to decorate
Step 7: Cut plastic straws into different lengths and insert inside toilet paper roll


For the pretend apple pie repeat steps 1 to 3.
Do the same steps on the other end of the toilet paper roll.
Label and decorate with markers and crayons.
 

Thursday, May 9, 2013

Toilet Paper Craft: Little Village

If you have been following my blog you probably know by now how much fun I have crafting with toilet paper tubes.
 
My toilet paper roll vintage plane together with my pretend canned food seem to be one of the favorites. (click here, too for another vintage plane version!) 
 
Here’s another toilet paper tube craft that you’ll also enjoy.
 
 
Materials needed:
Toilet paper tubes
Scissors
Glue
Fine point pen
 
Step 1: Fold tissue paper rolls lengthwise 2 times to form a “square cylinder”.


Step 2: Make 4 flaps on one end by making vertical cuts on each corner.


Step 3: Take 2 opposite flaps and cut each of them to form a triangle.


Step 4: Take the other opposite flaps and glue them together.


Step 5: Draw out details with a fine tip pen.
 
You may keep the design basic and simple or as elaborate as you want. Either way, you are likely to make more than one!

Sunday, August 12, 2012

Super Easy "Crown" Party Hat


I know I promised to do a tutorial on knitting. However, the heavy rains and floods have prevented me from going out and purchase some yarns. I am currently working on a knitted bunny (yes, another project at my son's toddler class)and I am excited about how it will turn out. I was hoping to finish the major portion of the "body" and start on the other bunny parts during class. Unfortunately, I ran out of yarn.

Anyway, here's something I made for the 70th birthday party my sisters and I surprised our parents with
a couple of weeks ago.


These are made of (you guessed it) toilet paper tubes!
To make simply cut a zigzag pattern on one end, spray paint to any colored desired, punch two holes, insert and tie a garter string.  Super easy.


In case you're wondering about the tiered container, it is something you could easily make out of old tin cans.

Monday, January 9, 2012

Reusing Toilet Paper Rolls

We've started taking down the Christmas ornaments both at my parents' house and ours. The garlands, Christmas lights, cardboard Christmas trees, gingerbread men and yup, even the
paper cupcakes have already been packed away and stored. The only thing left hanging is the appreciation wreath at my parents'front door (I don't feel like taking it out just yet).    

Anyway, speaking of packing away and storing stuff, here are useful ways that will make you think twice about disposing toilet paper rolls (even the ones used for foil, plastic wrap, etc.
--keep them all!).

Aside from creating play canned food or vintage planes out of them you may also wrap and store your Christmas lights around these cardboard tubes and prevent them from getting tangled.


Here (left) I used plastic wrap tubes but you can also insert toilet paper tubes together (right)

I also use them to hold documents and most of Alonzo's artworks! 


Sunday, October 30, 2011

toilet paper craft: vintage airplane

i know it's been a while since my last post. i had a really busy week. my halloween projects have piled up on me and
it's almost the 31st! i guess i'll just have to save my unstarted and unfinished projects for next year. 
i also realize that this craft project isn't exactly in tune with the halloween season but it'll have to do (see last photo).   


the idea for this project hit me in the wee hours of the morning. 
(just as soon as my little toddler woke me up, searching for his favorite thing in the world --- his "binky"). 
before going to bed i had been staring at a drawer full of toilet paper rolls and kept thinking of creative ways to re-use them.
we all have our light bulb moments. for most of us these light bulb moments come to offer guidance and providence, provide deep insight on life and its meaning. for me, my so-called "aha moments" inspire me about the profoundness of what to do with toilet paper rolls.

allow me to share my light bulb moment idea with you.... 

step 1: cut out the parts of your plane (i used corrugated card board) 


step 2: cut out a circular hole from toilet paper roll
(make it slightly off center)
step 3: cut out "slots" for the wings and tail


step 4: insert 2 circle cut outs on each end of the tube 
step 5: attach the rest of the plane parts and glue in place


step 6: paint and attach stickers onto plane (optional)


this little witch prefers to fly by plane over the traditional broomstick!
 

Monday, September 5, 2011

toilet paper craft: pretend canned food

this craft idea is a result of my current obsesion. if you have been following me these past few days you probably know that i have been obsessed lately with toddler sized miniature food for my little guy's kitchen pantry (maqui, this is partly your fault! hahaha!). that reminds me, i'll be posting some of my miniature food finds soon. in the mean time, here's a really fun project that you could do with toilet paper rolls. ENJOY!       


materials needed:
toilet paper roll
canned food label
cardboard (or an empty soap box, etc..)
scissors
glue
duct tape
marker

note: this project works best when using the labels from smaller cans (you can use earth's best baby food labels!). the larger ones won't look good unless you use rolls with a larger diameter.  however, you can also just cut out pictures of canned food from grocery cataloges or magazines OR you can download and print your labels this site (and this too!).  

step 1: cut toilet paper to length that matches height of food label

step 2: make 2 tracings of the ends of the toilet paper tube

step 3: use tracing as a guide and cut a circle about 1 cm larger

step 4: make several vertcal cuts perpendicular to the circle and fold inward

step 5: glue folded part onto the inner ends of the toiler paper tube
step 6: repeat steps 1-5 on the other end of the tube

step 7: cover tops and bottom ends of the "can" with duct tape
  
step 8: wrap food label around

step 9: with a marker draw "pull-open tab" and concentric rings on top  

this craft project would have kept me up all night had i not ran out of canned food to peel the labels from. hubby would now have to guess the contents of our label-less cans!