It was the summer before my 2nd grade when my teen-aged yaya introduced me to the art of fabric dying. I remember that she boiled water in an old metal pot (once used to boil my baby bottles) in an outdoor fire just beside the bahay kubo at the backyard.
Ate Ludy had 3 packets of blue "dyobos" and a couple of old t-shirts that she intended to dye. She didn't do any of those tying techniques and only intended to dunk everything in so all her shirts would turn into the same blue shade. Being the curious 8-year-old that I was, I eagerly threw in ALL my pambahay shirts. Needless to say, Mama was furious at both of us and I was left that whole summer with nothing to wear other than bluish-gray colored shirts!
I've shied away from fabric dyeing only until about 2 years ago to resurrect a newly bought white top that had been accidentally splattered with indelible ink!
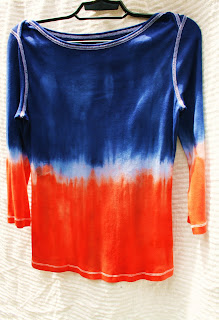
Anyway, for this project I still used the same Venus "dyobos" brand used by Ate Ludy but this is the first time I used 2 dye colors.
I'm not sure though if the colors will stay as vivid after several washings.
Next time I"ll try a different dye brand.
step 1: Fold and tie with rubber bands as desired
(vertical folds result in horizontal stripes)
step 2: Prepare your dye as directed by the manufacturer
step 3: Soak one end of shirt
(up to the level of the rubber band) onto the dye bath
step 4: Rinse until water runs clear
step 5: Let shirt dry
(I prefered not to remove the rubber bands just yet at this point)
step 6: With a different dye color repeat steps 3- 5 on the other half of shirt
step 7: Cut off rubber bands
step 8: Dry completely before wearing
step 8: Dry completely before wearing
Note: Be careful washing your tie-dyed items!
The first few times they are washed, they might bleed, so wash them with like colors or alone.


No comments:
Post a Comment