Saturday, February 22, 2014

Alonzo's Birthday Balloon Surprise Tradition

Last year, we started a new tradition of having a cascade of balloons for Alonzo on the day of his birthday. Pumping balloons and stuffing them between the door and a sheet of plastic taped around the door frame is, as we eventually realized, not as easy as it seems. Things would be different though had Alonzo slept in a separate room.
 
different method...
So, this year I thought of simply hanging the balloons to allow us access in and out of the room while the birthday boy is blissfully asleep.  

...same happy result as last year!

Happy birthday, Alonzo! We love you so much!

Thursday, February 20, 2014

Quirky DIY Throw Pillow

I was recently reminded of an old, black and white movie by Elizabeth Ramsay that my sister and I used to watch when we were younger. I do not remember the title (I don't think I ever knew what it I was to begin with) but there was this particularly funny song that I can vividly remember. The lyrics used to generate a lot of snickers and giggles between my sister and I. 


The catchy line goes "sa isang libo mong halik ako ay puputi...". Not exactly politically correct but I can't deny that it still makes me giggle. This inspired to create another stencil project with throw pillows! Check out Yahoo! She for the tutorial.

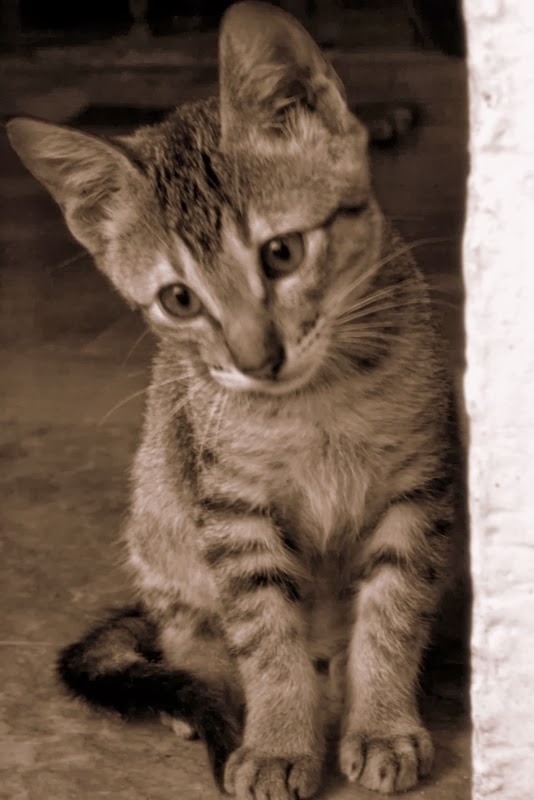
Also, in one of my very first posts for this blog I mentioned about my niece's cat named Cat-y (formerly known as Lulu). The photo that I took of Cat-y as a kitten kind of reminds me of those 80's Hallmark greeting cards. 
 
  
A simple photo transfer iron-on sheet can help you "transform" a favorite photo into a throw pillow.     


And lastly, for your viewing pleasure here's an excerpt of the movie I told you about. Enjoy!
     

Monday, February 17, 2014

Guest Crafter: DIY Toy Telephone

Happy Monday, you guys! Let me start the week off with my first ever guest crafter post. 

Now, isn't this DIY telephone simply adorable? I L-O-V-E how the materials made use of recycled stuff (toilet paper roll, hello???)...and how charming is it that the numbers are written backwards (hee-hee)? Love it!      


Before further ado, my feature crafter is no other than Dr. Katet Capulong. We first met in December 2000, during an entrance examination at the University of the Philippines. We were both applying for a residency slot at the Orthodontics Graduate School Program and we have been close friends since then! What else can I say? We were thesis mates, poster presentation partners, compre-exam study buddies, partners-in-crime (whenever we felt rebellious against Dr. H) and oh, she was a bridesmaid, too, at my wedding!

Here's a step by step guide from our feature crafter herself:  

1. I started doing the body of the telephone by using the inner side of a milk box (1.6 kg box). Shape and cut it to form a trapezoid.
2. Using a colorful box, I cut a big circle to serve as the phone's dial. I cut a smaller circle to put over the big one.
3. Cut 10 small circles around the dial using a puncher. Place the numbers 1-0
4. I used the cardboard of 2 tissue paper rolls to make the receiver. Tape them together to make them longer. You may use the cardboard from a  paper towel roll too.
5. Cut 2 plastic cups and put them on the two ends of the tissue rolls.
6. I used a tiny paper bag around 2-2.5 inches long and cut it to hold the receiver. Glue them on top of the body of the telephone.
7. Attach a ribbon on the end of the receiver. Twist the ribbon to make them curl and attach the other end of the ribbon to the base of the telephone.

Happy crafting!

Sunday, February 16, 2014

Repurposing Empty Wire Spools

I've been looking around for large, empty wire spool for  the longest time. I even approached a clerk from True Value and asked if I could purchase some of their empty spools...but only got a disturbed expression as if I were crazy woman! Anyway, hubby was lucky enough to have found large, plastic spools.

Tuesday, February 11, 2014

DIY Knitted Sweater Makeover


This old, knitted top has been hidden in my closet for the longest time. I've had this since the 2001. For something that's more than a decade old, it still looks pretty good. Understandably so as I have worn it for only a couple of times!


Anyway, during the holidays (late post again!)I decided to add a little whimsical touch to it by sewing circular beads that form a little bow tie. I have word this top a few times already since then...I just hope it doesn't get too warm soon so I could wear it a little bit more!   


Monday, February 10, 2014

Toilet Paper Tube Projects

I will never seem to get tired of creating toilet paper tube projects (after all, it's something that we always have around!). Visit Yahoo! She for an article I made about some of my projects.

Sunday, February 2, 2014

Stir-fried Peppers

Let my first post for the month of February be a fiery one. Well, this recipe isn't exactly hot and spicy as it seems. These peppers are actually sweet-tasting. My mom and aunts went on a road trip to Ilocos recently and brought these as pasalubong. These chilies have a strong resemblance to finger chilies (also called siling pangsigang or siling haba) but taste nothing like them. They have a subtle sweet and nutty flavor -- kind of like Baguio beans. At the market place in Ilocos they are simply called "sweet peppers". I can't exactly say that I have never seen anything like these peppers before...as I just said they do look like the regular, green sili used for our sinigang recipes but I am certain that these are not available here (at least at the local palengke or talipapa where we shop). Those 2 varieties look so much alike that it is likely that the one piece hubby picked with his fork was a "stray" as he was the only (unfortunate) person who instinctively reached for a pitcher of water (I'm not kidding!). Anyway, if you do come across some sweet peppers get some and try this simple recipe. It might just be worth the risk!

Ingredients:
Sweet peppers
Olive oil
Garlic, minced
Salt and pepper to taste

Procedure:
Heat oil in a medium heat pan. Add garlic and brown them a little. Set aside. Toss in peppers and cook for a few minutes. Season with salt and pepper. Turn off heat. Add cooked garlic and serve.

Enjoy!