Showing posts with label fashion. Show all posts

Friday, November 6, 2015

DIY Hardware Accessories

In my older posts I mentioned how I sometimes find inspiration for my projects during trips to the hardware store. One of the upshots of these visits is a "tingga" choker that I created for Yahoo She!


Take a quick visit to your local hardware store and purchase a couple of pieces of washers or “tingga”. These disk-like thingies are generally used to support or fasten screws but is also used to play “sipa” if covered with  cloth or strips of plastic bags. 


Believe it or not, you could also use them to quickly create a fashionable accessory! Washers come in different sizes so feel free to experiment with different designs. 

For this specific piece use five washers in 3 sizes (1 large, 2 medium and 2 small). Keep the  smallest sized washers on each end, with the largest at the center. If you don’t like your choker to appear too shiny you may distress the washers by beating it with a hammer or by scratching the surface with sandpaper. Off set or balance the edgy hardware with a dainty and brightly colored ribbon. 

Materials needed:

Washers
Ribbon, about 1 meter


Procedure:

Step 1: Pass one end of ribbon through the under side of the 1st washer.  


Step 2: Next slip ribbon through the 2nd washer. This time pass it from the front towards the back 


Step 3: Flip 2nd washer over and pass ribbon back through the 1st washer 


Step 4: Insert ribbon into the 2nd washer, from the back towards the front 


Step 5: Repeat steps 1-5 until you have threaded the 5thwasher


Step 6: Tie both ends of the ribbon


Friday, May 23, 2014

Refashioned No Sew Bikini for Toddlers

Refashion an old t-shirt into bikini top and bottom for your little toddler. All you’ll need is an old t-shirt and a pair of scissors. This project is so easy that you could put everything together in less than 10 minutes. Sewing skills are absolutely not required. Trust me; all it takes are a few cuts and knots!


Step 1: Lay t-shirt on a flat surface.


Step 2: Fold the middle part of the front and back of the shirt towards the sides, positioning the side seams at the center.


Step 3: Position scissors at the corner of the neckline and cut downwards at an angle, leaving around 3-4 inches from the bottom hem 

Step 4: From the shoulder area cut downward, using the side seams as a guide. Direct the scissors horizontally to leave about 2-3 inches from the bottom. You will end up with 3 separate pieces. The bikini top will be made from the larger center piece while rectangular piece will form the bikini bottom. Discard the third scrap of fabric.   


Step 5: Cut the back portion all the way through and unfold fabric.  


Step 6: Make 2 vertical cuts along upper portion of each of the “triangles” and braid to make the straps.


Step 7: Make a simple knot at the center.
 

Step 8: To form the bikini bottom, get the other piece of fabric that formed the back of the shirt and fold in half. Fold in half again.


Step 9: Trim off the top portion (open ends) to form a straight line.
Step 10: Measure about 1 ½ inches from the center fold and cut at an angle. Direct scissors horizontally to leave about 1 ½ inches from the open ends.


Step 11: Unfold and tie to straps together.


Tadaa!


Tuesday, January 21, 2014

DIY T-Shirt Pocket


This is what we gave out as gifts for the kiddos last Christmas. I was really set on going to Divisoria to purchase plain white shirts but I found good-quality, cotton shirts at Robinsons. Although the brand also carried all-white tees which was exactly what I was looking for I was instantly drawn to the colored ones.    
 

To give the shirt a personalized, hand-made feel (I told myself to only give out hand-made gifts this year) I sewed on little chest pockets out of retaso.


Saturday, January 11, 2014

DIY Wearable Pasta Jewelry


Holy macaroni!  I wore one of these to work for 3 days in a row last week and nobody noticed that it was made of pasta noodles. The instructions to make these a really super easy. Check them out at Yahoo! She.  

Thursday, September 12, 2013

DIY Tassel Necklace

Remember the tassels I made a couple of days ago? These are intended to be used for a throw pillow project. Well, can we say that I got a little carried away (see photo below)?
 
 
Anyway, my throw pillow project was put on hold for a while as my attention was a little diverted by a buzzfeed article that prompted me to create this tassel necklace. I added a little twist to the design by adding a strand of friendship bracelet.
     
 
Materials needed:
Canvas cord
(I had a few meters left from my popsicle chain necklace and hex bolt bracelet project)
Crochet thread
Tassels
Beads (optional)
Friendship bracelet (optional)
 
Step 1: Insert beads through canvas cord
 
Step 2: Attach tassels and friendship bracelet by winding crochet thread around loose ends of the tassel head and canvas cord
 
 
Step 3: Use the same method to connect loose ends of the canvas cord
 

Monday, May 20, 2013

DIY Shoe Semi Makeover

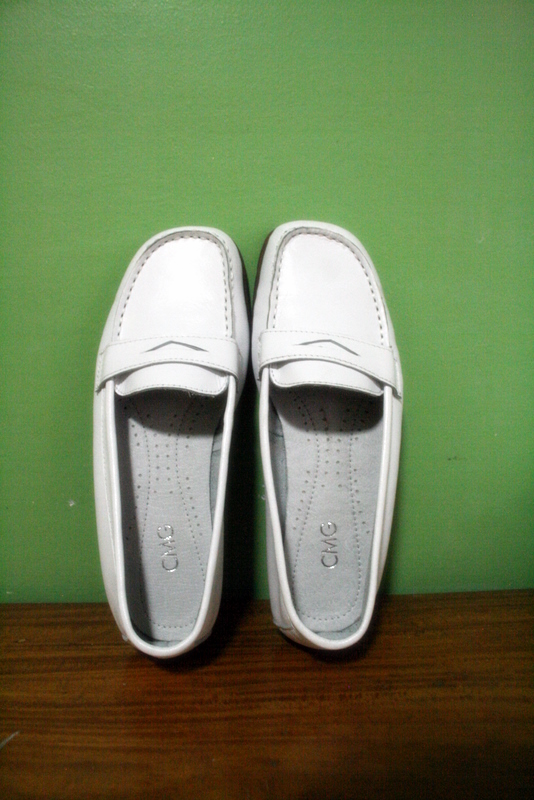
I recently rediscovered on old pair of white shoes from my closet. It was a pair that I used for hospital duty several years ago and have never been used since. I do remember planning to have it dyed into a different color before but because the pair had been shoved at the farthest and highest level of our shoe closet I completely forgot about it.
 
still brand new --
taken several years ago
when I still dilligently participated in
Project 365
 
Understandably, I found it looking a little beat up. So finally, I took it to Mr. Quicky and had it dyed. I chose to have it done in navy (after much deliberation). Also, I wanted to leave the tongue part of the shoe in its original white color -- kind of like a pair I had in the 90's. I didn't however trust the manong to do the job accordingly so chose to have it colored all over instead.
 
Bad call.
 
 
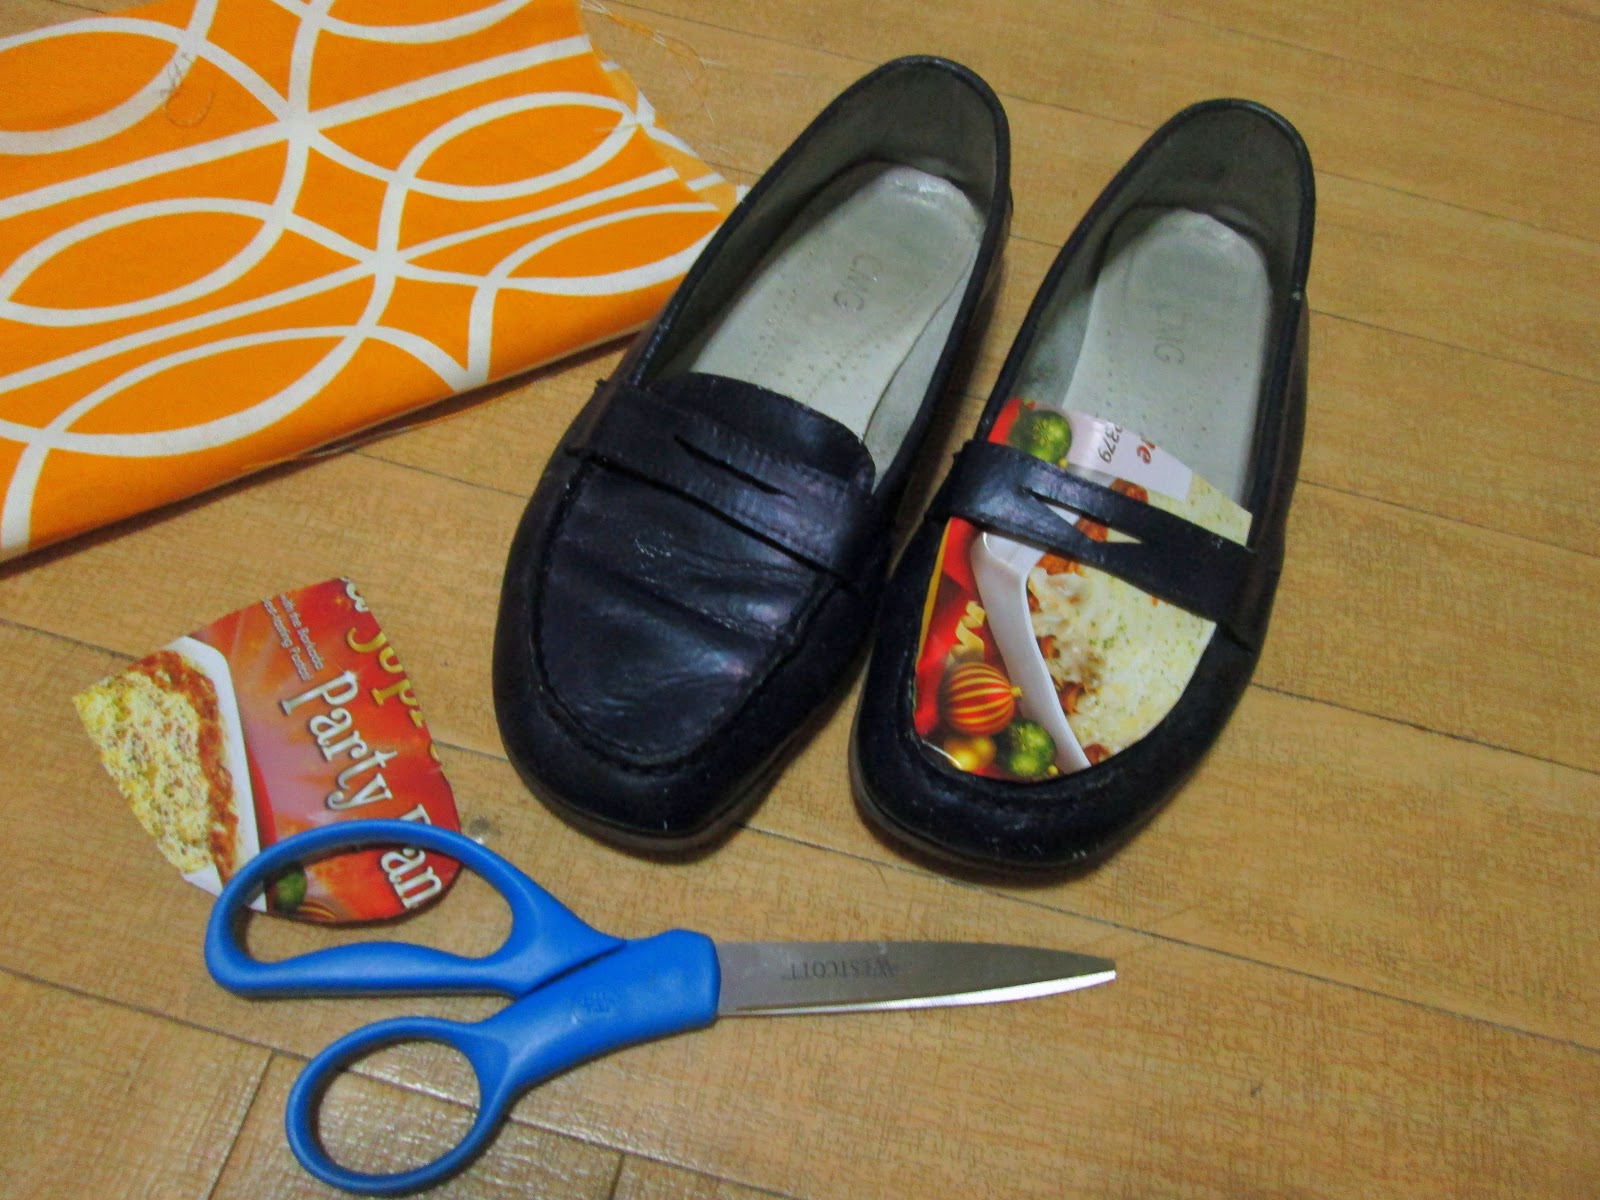
It ended up like an over used gradeschool shoe -- but in purple. Yep, apparently the navy colored swatch they showed me didn't exactly match the "navy" dye they used. I could live with the purple color but what I wasn't happy about was how "school girlish" "schoolmarmish" it looked.
 
I have seen several tutorials on how to cover shoes with fabric and have toyed with the idea but always chickened out. This was the perfect opportunity to try it out!  
 
Materials needed:
scratch paper
pencil
scissors
glue
fabric
 
Step 1: Use pencil and scratch paper to trace the "tongue: part of the shoe to make a pattern
 
Step 2: Use the pattern to outline the underside of the fabric. 
Make sure to lay the pattern on the center if your fabric has any form of print on it.
 
 
Step 3: Cut fabric.
Step 4: Wipe shoe with a dry cloth to make sure it is clean.
Then check how the fabric fits over the shoe.
 
 
Step 5: Apply a layer of glue over the shoe (I used Elmer's glue) and lay fabric over.
 
Step 6: Apply another layer of glue over the fabric and let it dry
    
   
Fancy, eh? 
 

Sunday, May 12, 2013

Mother's Day T-shirt Project

Last year I stencilled a shirt with a sillouette of my mom-in-law for Mother's day and I forgot to share with you here.


For instructions on how to make this please click here. 

Saturday, May 11, 2013

Reusing Alonzo's Diaper Bag

When we had to shop for a diaper bag (wow, this seems like such a long time ago!)I specifically looked for a style that doesn't look anything like a diaper bag and for something I could use after my son graduates from his nappies. 
 
We didn't have to look far as I immediately found what I wanted. Alonzo's Skip Hop diaper bag has served us well for the past 3 years.


 Surprisingly, it still is in pretty good shape considering all the abuse it had been subjected to. 
 

 It is what I use now for my laptop and other stuff!

Sunday, April 7, 2013

DIY Mini Minaudiere

As promised on my most recent post, here's a fashionable way to reuse and repurpose empty mint cans. 
 
Glamorize an empty hinged tin container, such as the ones used for breath mints, by embellishing it with beads, buttons, sequins or any ornament with a flat base. With a few simple, easy steps you’ll be able to create for yourself a mini minaudière.
 

  Materials needed:
Hinged tin can or container
 
 
Spray paint
Beads or any embellishment  
Mighty Bond

 Procedure:
Step 1: Spray paint the outer surface. Let dry
Step 2: Lay beads over the tin container and arrange them according to your preference
Step 3:  Glue on beads and let dry
 

Tadaah!


I bought the square beads from Carolina's while the torquise one is an embelishment from an old pair of sandal that broke out on me while I was at the mall!

Saturday, February 23, 2013

DIY No-Sew Bow Tie

The idea for this bow project is reminiscent of the kind we used to make in grade school. My classmates and I used to make these and attached them on to hair clips or headbands. This time though I used them as a bow tie for Alonzo.   
 

 Don't you think that the little guy is looking pretty dapper?  I was really loving how it has turned out and also came up with the idea of attaching it to a slim belt.
 
 
 You'll be amazed how this no-sew project will only take a few minutes of your time. Best of all, you probably already have all the materials needed for it -- it won't cost you a thing!
 
For materials and instructions please check out Yahoo! She.
 
Thanks for agreeing to model the belt for me, Miss Richel!
 

Friday, February 1, 2013

Refashioning a Mumu

Around summer time last year, I found this oversized, navy printed mumu at a local thrift shop (read: ukay ukay) and bought it for only P10.00. I don't wear mumus but I thought I could sew it into throw pillows for the living room. I kept the mumu in a basket (where my other pending projects are stored) and totally forgot about it until early this year when we did some spring cleaning!  
 
 
 However, instead  of sewing it into throw pillows I decided to turn them into  a pair of pants.