Showing posts with label crafts. Show all posts

Friday, November 6, 2015

DIY Hardware Accessories

In my older posts I mentioned how I sometimes find inspiration for my projects during trips to the hardware store. One of the upshots of these visits is a "tingga" choker that I created for Yahoo She!


Take a quick visit to your local hardware store and purchase a couple of pieces of washers or “tingga”. These disk-like thingies are generally used to support or fasten screws but is also used to play “sipa” if covered with  cloth or strips of plastic bags. 


Believe it or not, you could also use them to quickly create a fashionable accessory! Washers come in different sizes so feel free to experiment with different designs. 

For this specific piece use five washers in 3 sizes (1 large, 2 medium and 2 small). Keep the  smallest sized washers on each end, with the largest at the center. If you don’t like your choker to appear too shiny you may distress the washers by beating it with a hammer or by scratching the surface with sandpaper. Off set or balance the edgy hardware with a dainty and brightly colored ribbon. 

Materials needed:

Washers
Ribbon, about 1 meter


Procedure:

Step 1: Pass one end of ribbon through the under side of the 1st washer.  


Step 2: Next slip ribbon through the 2nd washer. This time pass it from the front towards the back 


Step 3: Flip 2nd washer over and pass ribbon back through the 1st washer 


Step 4: Insert ribbon into the 2nd washer, from the back towards the front 


Step 5: Repeat steps 1-5 until you have threaded the 5thwasher


Step 6: Tie both ends of the ribbon


Sunday, October 26, 2014

Alonzo's 2014 Halloween Costume

Hello, everyone! I know it's been a while. The past semester has been really tough and hectic. Needless to say, I missed crafting and blogging about my crafts. Don't get me wrong. I've still been into crafting small projects here and there. Nothing major.
 
All set for trick or treat!
But Halloween is a different story. Alonzo looks forward to his yearly trick or treat activity (the only time of the year he is allowed to eat candy!) while I also find the holiday as an excuse to prioritize crafting over work. Semester-enders can be quite busy for professors (final exams, grade submission, etc.) But how can I pass on one of my favorite holidays (and Alonzo's, too!) for some crafting
 
I started working on Alonzo's costume 3 weeks ago. He's been so much into his Lego toys lately that to dress him as a Lego man seemed so spot on. I had my hesitations, however. His past Halloween costumes have all been so fuss-free and easy to put together and wear. We never had problems about him refusing to wear his costume at the last minute or anything like that at all. But, as I said, he is so crazy about Lego that he is truly excited about his costume!  
 
Believe it or not, this year's costume is probably the most hassle-free of all (alright, probably because I had a 3 week head start) and it didn't cost me a thing! All the materials are recycled or made out of stuff we already had in the house.  
 
The first thing that I worked on was the "body". This is made of an electric fan box which I cut and re-structured to form a trapezoid. The dimensions were measured and cut according to Alonzo's size (shoulder width, neck and arm hole circumference, etc.). I spray painted the outer surface and left it to dry over night. A computer printed Lego logo on sticker paper gives it a more distinct look.   


As for the Lego hair, the technique was the same as for creating Alonzo's  paper mache egg. I just made sure that the balloon used is slightly larger than the widest circumference of Alonzo's head. After it has completely set, pop the balloon and cut to resemble a Lego snap-on hair. I made a couple of zig zag cuts to create fringed bangs. We didn't have black paint around so I used gray spray paint instead. This turned out to be a better idea because it allowed me to draw "hair waves" with a black marker pen. 


To top off the look, I made his treat bag to resemble an over-sized Lego block. I took on empty medium-sized box and spray painted it with red and glued soda bottle caps. I also punched holes on each side to tie strings for the handle.  


 Voila!


Alonzo giving me his "orc face" expression when I asked him to smile for the photo

Sunday, April 27, 2014

DIY Street Chalk

Imagine all the empty eggshells leftover after Easter egg hunting. Keep them all next time! Here’s a fun, creative and eco-friendly way to recycle them. You can create street chalk out of eggshells.  These chalks are good to draw on concrete, asphalt and stones. Use them to draw patterns for playing piko, patintero, tic-tac-toe and for creating your own sidewalk art.


Materials needed:
12 eggshells
6 teaspoons flour
Warm water
Food color
Mortar and pestle
Moulds such as ice cube trays, cookie cutters, polvoron shaper

Step 1: Wash and dry the eggshells. Peel off the inner membrane.
 

Step 2: Use a mortar and pestle to grind eggshells into fine powder. Transfer into a bowl.


Step 3: Add flour and water to form a very thick paste.
Step 4: Divide mixture into separate containers and add drops of food color on each container. Mix well until the color is evenly distributed.


Step 5: Roll to form cylinders or place eggshell mixture into moulds. Place on a flat surface and let them dry for 2 days. 


Note:A dozen eggshells will yield about 10 discs.

Tuesday, April 22, 2014

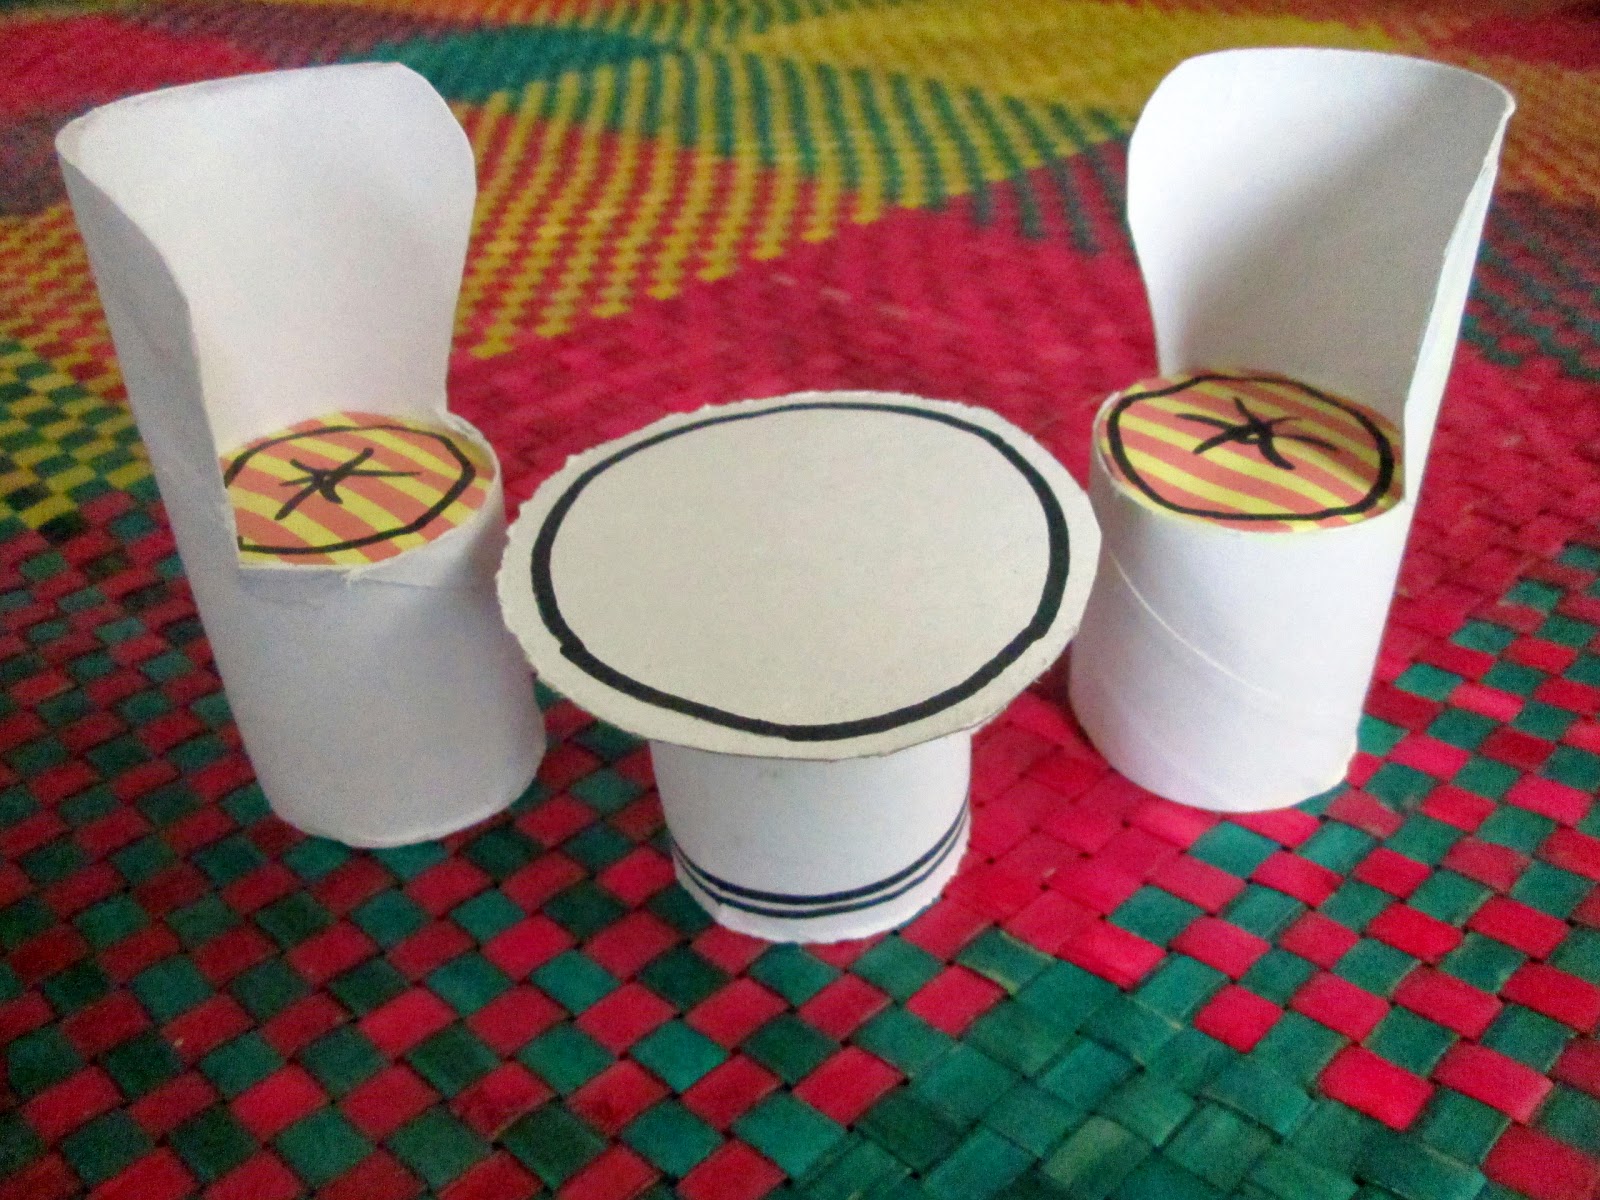
DIY Doll Table and Chair Set


Here's another amazing way to recycle toilet paper rolls into toys.   Turn those tubes into an easy-to-assemble set of miniature chairs and table that your kids (and dolls) would love. 


Material s needed:
Toilet paper tubes
Scissors
Cardboard
Old gift wrapper or any paper with a pretty print
Glue

Step 1: Cut tissue paper roll to make a “back rest” 


Step 2: Trace the end of the tube on a piece of cardboard to make a circle

Step 3: Cut to make a “seat”
Step 4: Use a small piece of gift wrapper to cover the “seat”
Step 5: Attach “seat” with tape
Step 6: Cut cardboard to form the top of the table
Step 7: Attach to toilet paper tube with tape 


I hope that this would inspire some DIY projects of your own!

Saturday, April 19, 2014

Make your own faux taxidermy

Taxidermy is a fun and whimsical decorative element that could add style to your home. If you are grossed out by the idea of having a dead animal’s head sticking out of your wall but still want to be on trend with the taxidermy craze create your own version with items you already have around. How’s that for a green and animal-friendly project?
 
 
Materials needed:
Plastic bottles, bowls, spoons, thread spools, twigs, etc..
Cutter
Scissors
Glue gun
Cardboard boxes
Scrap paper, cut into small pieces
Cornstarch
Spray paint

Step 1: To make a basic "head" cut bottom part of a plastic bottle at a slight angle and attach to a plastic bowl to form a "snout". Adjust the length and angle of the "snout" depending on the form that you prefer.


 Step 2: Cut a notch on each sides of the rim of the bowl.


Step 3: Attach a plastic spoon on the notch created for the “ears”. Rummage through your recycling bin and play around with the different materials to come up with a configuration that you like.  Use old pasta tongs to create a moose’s “antlers”, thread spools to form “horns” --- use your imagination!    
Step 4: Cover by layering with strips of paper and cornstarch glue. *
 

Step 5: Let it dry and spray with paint.
Step 6: Attach taxidermy “head” to a cardboard box and mount on a wall.


*cornstarch glue recipe:
Dissolve cornstarch and water. Place over medium heat and stir continuously until the mixture thickens and becomes translucent. Turn off heat and let cool before using.